ラテン方陣
ラテン方陣を作るスクリプトを書いてみました。
コマンドは3つの引数をとります。
第1引数は、方陣の大きさ、第2、第3引数は、それぞれ、列方向、行方向の並べ替え順を示します。
並べ替え順は階乗進法で表した数とし、対応する順列が使用されます。0を指定すれば標準形が使用されます。
#!/usr/bin/env python
# -*- coding: utf-8 -*-
import sys

def factoradic(n):
    """指定された自然数nを、階乗進法で表した配列を返す
        ex) n = 85 ==> 85=3*4!+2*3!+0*2!+1*1! なので
                       [3,2,0,1]を返す
    """
    rslt = []
    rslt.append(n%2)
    n = n - rslt[0]
    k = 2
    while n != 0:
        r = n / k
        a = r % (k+1)
        rslt.append(a)
        n = n - a * k
        k = k + 1
    rslt.reverse()
    return rslt

def k_factoradic(k, n):
    """k桁の階乗進を表す配列を作成する"""
    rslt = factoradic(n)
    l = len(rslt)
    if l < k:
        l = ([0]*(k-l))
        l.extend(rslt)
        return l
    else:
        return rslt[-k:]

def permute(sqquence, factor):
    """sequenceを入替えた順列を作成する、factorは階乗進で表した並べ方を示す"""
    k = len(sqquence)
    f = k_factoradic(k-1, factor)
    #print sqquence, f
    rslt = []
    for i in range(k-1):
        rslt.append(sqquence[f[i]])
        sqquence.pop(f[i])
        #print sqquence, rslt
    rslt.append(sqquence[0])
    return rslt

def latin_square(k, row_factor=None, col_factor=None):
    """ラテン方陣を作成する"""
    sq = []
    row = range(1, k+1)
    if row_factor is not None:
        row = permute(row, row_factor)
    for i in range(k):
        sq.append(row)
        tmp = row[1:]
        tmp.append(row[0])
        row = tmp
    if col_factor is not None:
        sq = permute(sq, col_factor)
    return sq

def print_sq(sq):
    k = len(sq)
    for i in range(k):
        for j in range(k):
            print sq[i][j],
        print

def main():
    (k, row_factor, col_factor) = (5, None, None)
    argc = len(sys.argv)
    if argc >= 2:
        k = int(sys.argv[1])
    if argc >= 3:
        row_factor = int(sys.argv[2])
    if argc >= 4:
        col_factor = int(sys.argv[3])
    print_sq(latin_square(k, row_factor, col_factor))

if __name__ == "__main__":
    main()
MacでKindle(genymotion)
先日の角川書店のKindle70%オフセールで、少々大人買いしてしまった。といっても、手元にあってKindleが読める端末はiPhoneしかない。Nexus7は今や義父のオモチャになっている。PCやMacで読めればいいやと思っていたのだが、あいかわらずKindleはあいかわらずPCやMacには対応していないらしい。
どうしようかと思ってググってみると、BlueStackとかいAndroidアプリプレーヤで読めますという記事が多数引っ掛かるので、PCにインストールしてみた。結果としてはペケ。PlayストアからKindleをインストールするとこまではうまく動くものの、Kindle自体が起動してログインしようとするとすぐにフリーズしてしまい。まったく使い物にならない。Mac版でもほぼ状況は同じ。
こまったなと思ってさらにググってみると、genymotionというAndroidエミュレータがよいとか。結果的にはこれで大正解。キチンと動いてくれる。
基本的には、次の記事に従ってやったらほとんど問題なくできた。
「Miix2 8 レビュー20―『Genymotion』で「Google Play」をインストールする方法」
もちろん、記事の内容はWindows8のタブレットでのものなので、適宜Macに置き換える必要はある。
引っ掛かったのは次の2点くらい。
- ADBのON/OFF
- インストールしたのはgenymotionの2.1.2だったので、ADBの設定に関する動作が多少違う。とにかく、ADB使う場合にはSDKのパスを設定すること。(画面の文言が多少分かりづらくて、defaultでもADB使えるのかもとちょっと誤解しそうなので)
- zipの形式(flashableかどうか)
- Safariで、デフォルトの設定のままでzipをダウンロードすると、自動的に解凍されてしまう。これを圧縮し直してもまるきりもとには戻らないようで、インストールには使えない。Safariの設定を変更して、zipのまま残るようにしてから、genymotionの仮想でバイスにDrag&Dropしなければうまく動かない。ログを見る限り、内部的には仮想デバイスの画面にファイルをDropすると、flashableかどうかを判定し、flashableであれば実行するかどうかを問い合わせるダイアログが出てくる。flashableでなければ、/sdcard/Downloadの下にコピーされる、という動きになっている模様。
とにかく、これでMacでKindleが使えるようになったのでちょっと幸せ。
ただし、スワイプの動作とかどうするのかまだ分からん。今後の課題。
Pyramidのインストール
PythonのWebフレームワークは色々あるけど、Pyramidをいじってみることにした。以前、ほんの少しドキュメントを読んだことがあって、それによるとZope2/Zope3の失敗を踏まえて作ったモノだとか。設計が美しいと評判というウワサも。でも、そういうのって大概流行んないんだよな。8080に対する6800とか。いまだにPHPは流行ってるし。カラダにいい食べ物より、手っ取り早いファストフード。
とりあえず、Quick Tour of Pyramidを見て、インストールする。
まずは、Python3.3用の仮想環境の構築。pyvenvを使う。
Pyramidの日本語サイトは、virtualenvによる環境構築が推奨されているので、情報が古いのかもしれない。
pyvenv-3.3 env33
次に、setuptoolsのインストール。wgetがなければ、事前にhome-brewでインストールする。
wget https://bitbucket.org/pypa/setuptools/raw/bootstrap/ez_setup.py -O - | env33/bin/python
続いて、Pyramid自体をインストール。
env33/bin/easy_install "pyramid==1.5a3"
Python3のインストール
homebrewに続いて、Python3をインストールする。
他のパッケージに関する
ore-no-MacBook-Air:dev ore$ brew install python3
==> Installing dependencies for python3: pkg-config, readline, sqlite, gd
==> Installing python3 dependency: pkg-config
==> Downloading https://downloads.sf.net/project/machomebrew/Bottles/pkg-config-
######################################################################## 100.0%
==> Pouring pkg-config-0.28.mountain_lion.bottle.2.tar.gz
🍺 /usr/local/Cellar/pkg-config/0.28: 10 files, 644K
==> Installing python3 dependency: readline
==> Downloading https://downloads.sf.net/project/machomebrew/Bottles/readline-6.
######################################################################## 100.0%
==> Pouring readline-6.2.4.mountain_lion.bottle.2.tar.gz
==> Caveats
This formula is keg-only, so it was not symlinked into /usr/local.
OS X provides the BSD libedit library, which shadows libreadline.
In order to prevent conflicts when programs look for libreadline we are
defaulting this GNU Readline installation to keg-only.
Generally there are no consequences of this for you. If you build your
own software and it requires this formula, you'll need to add to your
build variables:
LDFLAGS: -L/usr/local/opt/readline/lib
CPPFLAGS: -I/usr/local/opt/readline/include
==> Summary
🍺 /usr/local/Cellar/readline/6.2.4: 31 files, 1.6M
==> Installing python3 dependency: sqlite
==> Downloading https://downloads.sf.net/project/machomebrew/Bottles/sqlite-3.8.
######################################################################## 100.0%
==> Pouring sqlite-3.8.2.mountain_lion.bottle.tar.gz
==> Caveats
This formula is keg-only, so it was not symlinked into /usr/local.
Mac OS X already provides this software and installing another version in
parallel can cause all kinds of trouble.
OS X provides an older sqlite3.
Generally there are no consequences of this for you. If you build your
own software and it requires this formula, you'll need to add to your
build variables:
LDFLAGS: -L/usr/local/opt/sqlite/lib
CPPFLAGS: -I/usr/local/opt/sqlite/include
==> Summary
🍺 /usr/local/Cellar/sqlite/3.8.2: 9 files, 2.0M
==> Installing python3 dependency: gdbm
==> Downloading http://ftpmirror.gnu.org/gdbm/gdbm-1.11.tar.gz
######################################################################## 100.0%
==> ./configure --prefix=/usr/local/Cellar/gdbm/1.11 --mandir=/usr/local/Cellar/
==> make install
🍺 /usr/local/Cellar/gdbm/1.11: 16 files, 420K, built in 25 seconds
==> Installing python3 dependency: xz
==> Downloading https://downloads.sf.net/project/machomebrew/Bottles/xz-5.0.5.mo
######################################################################## 100.0%
==> Pouring xz-5.0.5.mountain_lion.bottle.2.tar.gz
🍺 /usr/local/Cellar/xz/5.0.5: 58 files, 1.5M
==> Installing python3
==> Downloading http://python.org/ftp/python/3.3.3/Python-3.3.3.tar.bz2
######################################################################## 100.0%
==> ./configure --prefix=/usr/local/Cellar/python3/3.3.3 --enable-ipv6 --dataroo
==> make
==> make install PYTHONAPPSDIR=/usr/local/Cellar/python3/3.3.3
==> make frameworkinstallextras PYTHONAPPSDIR=/usr/local/Cellar/python3/3.3.3/sh
==> Downloading https://pypi.python.org/packages/source/s/setuptools/setuptools-
######################################################################## 100.0%
==> /usr/local/Cellar/python3/3.3.3/bin/python3.3 -s setup.py install --force --
==> Downloading https://pypi.python.org/packages/source/p/pip/pip-1.4.1.tar.gz
######################################################################## 100.0%
==> /usr/local/Cellar/python3/3.3.3/bin/python3.3 -s setup.py install --force --
==> Caveats
Setuptools and Pip have been installed. To update them
pip3 install --upgrade setuptools
pip3 install --upgrade pip
To symlink "Idle 3" and the "Python Launcher 3" to ~/Applications
`brew linkapps`
You can install Python packages with
`pip3 install <your_favorite_package>`
They will install into the site-package directory
/usr/local/lib/python3.3/site-packages
See: https://github.com/Homebrew/homebrew/wiki/Homebrew-and-Python
==> Summary
🍺 /usr/local/Cellar/python3/3.3.3: 4725 files, 93M, built in 4.4 minutes
ore-no-MacBook-Air:dev ore $ ore-no-MacBook-Air:dev ore $ brew install python3
-bash: ore-no-MacBook-Air:dev: command not found
ore-no-MacBook-Air:dev ore $ ==> Installing dependencies for python3: pkg-config, readline, sqlite, gd
-bash: ==: command not found
ore-no-MacBook-Air:dev ore $ ==> Installing python3 dependency: pkg-config
-bash: ==: command not found
ore-no-MacBook-Air:dev ore $ ==> Downloading https://downloads.sf.net/project/machomebrew/Bottles/pkg-config-
-bash: ==: command not found
ore-no-MacBook-Air:dev ore$ ######################################################################## 100.0%
ore-no-MacBook-Air:dev ore $ ==> Pouring pkg-config-0.28.mountain_lion.bottle.2.tar.gz
-bash: ==: command not found
ore-no-MacBook-Air:dev ore $ 🍺 /usr/local/Cellar/pkg-config/0.28: 10 files, 644K
-bash: 🍺: command not found
ore-no-MacBook-Air:dev ore $ ==> Installing python3 dependency: readline
-bash: ==: command not found
ore-no-MacBook-Air:dev ore $ ==> Downloading https://downloads.sf.net/project/machomebrew/Bottles/readline-6.
-bash: ==: command not found
ore-no-MacBook-Air:dev ore $ ######################################################################## 100.0%
ore-no-MacBook-Air:dev ore $ ==> Pouring readline-6.2.4.mountain_lion.bottle.2.tar.gz
-bash: ==: command not found
ore-no-MacBook-Air:dev ore $ ==> Caveats
-bash: ==: command not found
ore-no-MacBook-Air:dev ore $ This formula is keg-only, so it was not symlinked into /usr/local.
-bash: This: command not found"command not found"というメッセージがたくさん出ているのがちょっと気になるけど、もう一度installしてみるとインストール自体はできてるみたい。
ore-no-MacBook-Air:dev ore$ brew install python3
Warning: python3-3.3.3 already installed
と思ったら、python3とコマンド打っても反応しない。
一旦、uninstallしてもう一度installし直すことにする。
ore-no-MacBook-Air:dev ore$ brew uninstall python3 Uninstalling /usr/local/Cellar/python3/3.3.3... ore-no-MacBook-Air:dev ore$ brew install python3 ==> Downloading http://python.org/ftp/python/3.3.3/Python-3.3.3.tar.bz2 Already downloaded: /Library/Caches/Homebrew/python3-3.3.3.tar.bz2 ==> ./configure --prefix=/usr/local/Cellar/python3/3.3.3 --enable-ipv6 --dataroo ==> make ==> make install PYTHONAPPSDIR=/usr/local/Cellar/python3/3.3.3 ==> make frameworkinstallextras PYTHONAPPSDIR=/usr/local/Cellar/python3/3.3.3/sh ==> Downloading https://pypi.python.org/packages/source/s/setuptools/setuptools- Already downloaded: /Library/Caches/Homebrew/python3--setuptools-2.0.1.tar.gz ==> /usr/local/Cellar/python3/3.3.3/bin/python3.3 -s setup.py install --force -- ==> Downloading https://pypi.python.org/packages/source/p/pip/pip-1.4.1.tar.gz Already downloaded: /Library/Caches/Homebrew/python3--pip-1.4.1.tar.gz ==> /usr/local/Cellar/python3/3.3.3/bin/python3.3 -s setup.py install --force -- ==> Caveats Setuptools and Pip have been installed. To update them pip3 install --upgrade setuptools pip3 install --upgrade pip To symlink "Idle 3" and the "Python Launcher 3" to ~/Applications `brew linkapps` You can install Python packages with `pip3 install <your_favorite_package>` They will install into the site-package directory /usr/local/lib/python3.3/site-packages See: https://github.com/Homebrew/homebrew/wiki/Homebrew-and-Python ==> Summary 🍺 /usr/local/Cellar/python3/3.3.3: 4725 files, 93M, built in 2.1 minutes
今度は大丈夫みたい。どうやら、並行して行っていたXcodeでのComandLineToolsのインストールが終わってなかったのが原因のよう。
ore-no-MacBook-Air:dev ore$ python3
Python 3.3.3 (default, Jan  2 2014, 22:58:28)
[GCC 4.2.1 Compatible Apple LLVM 5.0 (clang-500.2.79)] on darwin
Type "help", "copyright", "credits" or "license" for more information.
>>>
homebrewのインストール
新年早々、テレビもつまらないのでMacをいじる。カミさんの実家なのでMBAしか手元にない。
Macでの開発にはhomebrewとかいうパッケージ管理ソフトが便利らしいので入れてみることにする。
インストールの方法は、公式サイトに書かれているとおり、次のコマンドをターミナルで実行するだけ。
ruby -e "$(curl -fsSL https://raw.github.com/Homebrew/homebrew/go/install)"
実行するとこんな感じ。途中でパスワードを聞かれたりするほか、特に厄介なことはなし。
anata-no-MacBook-Air:current_no_directory anata$ ruby -e "$(curl -fsSL https://raw.github.com/Homebrew/homebrew/go/install)"
==> This script will install:
/usr/local/bin/brew
/usr/local/Library/...
/usr/local/share/man/man1/brew.1
==> The following directories will be made group writable:
/usr/local/.
/usr/local/bin
==> The following directories will have their group set to admin:
/usr/local/.
/usr/local/bin

Press ENTER to continue or any other key to abort
==> /usr/bin/sudo /bin/chmod g+rwx /usr/local/. /usr/local/bin

WARNING: Improper use of the sudo command could lead to data loss
or the deletion of important system files. Please double-check your
typing when using sudo. Type "man sudo" for more information.

To proceed, enter your password, or type Ctrl-C to abort.

Password:
==> /usr/bin/sudo /usr/bin/chgrp admin /usr/local/. /usr/local/bin
==> Downloading and installing Homebrew...
remote: Counting objects: 144617, done.
remote: Compressing objects: 100% (47401/47401), done.
remote: Total 144617 (delta 102436), reused 137062 (delta 96151)
Receiving objects: 100% (144617/144617), 21.40 MiB | 860 KiB/s, done.
Resolving deltas: 100% (102436/102436), done.
From https://github.com/Homebrew/homebrew
 * [new branch]      master     -> origin/master
HEAD is now at 8befc4e mu: fix miscompilation on 10.9
==> Installation successful!
You should run `brew doctor' *before* you install anything.
Now type: brew help
インストールしたら、とりあえず "brew doctor" というコマンドを実行するのがオススメらしい。
ore-no-MacBook-Air:dev ore$ brew doctor
Warning: Broken symlinks were found. Remove them with `brew prune`:
  /usr/local/bin/github
実行してみたら、githubのsymlinkが壊れてた。
オススメのとおり、brew prune を実行してる。
ore-no-MacBook-Air:dev ore$ brew prune
Pruned 0 dead formula
Pruned 1 symbolic links from /usr/local
ore-no-MacBook-Air:dev ore$ brew doctor
Your system is ready to brew.
よく分からんけど、きれいになったんだろう。
DoxygenのXML出力
ひさびさに、仕事で(C++ではない)C言語を触っている。コーディングのお約束として、基本はグローバル変数、関数パラメータは使わない、構造体も使っちゃダメ、ということになってる。特殊用途なので仕方ないらしい。
ただ、こうなると、動作の解析が一筋縄ではいかないので、グローバル変数の一覧、参照範囲等をまとめた資料がほしくなる。という訳で、DoxygenのXML出力をちょこっと整形出力してみた。
出力はこんな感じになる。
Excelに読込むと、関数の上下関係の概略と、どの関数がどの変数を参照しているのか、多少なりとも分かりやすくなる。
ファイル名,L1,L2,L3,L4,L5,L6,L7,L8,L9,L10,参照変数名,説明
foo.c,hoge_sch,,,,,,,,,,,1000 XXXスケジューラ
foo.c,,hoge_cnt,,,,,,,,,,1100 XXX管理
foo.c,,,hoge_ini,,,,,,,,,1200 XXX入力管理
foo.c,,,,hoge_xxx,,,,,,,,
,,,,,,,,,,,v_yyy,○○○
,,,,,,,,,,,v_zzz,○○○
                 ・
                 ・
                 ・
foo.c,,,,hoge_yyy,,,,,,,,1300 XXXパラメータ設定
,,,,,,,,,,,v_yyy,○○○
,,,,,,,,,,,v_zzz,○○○
                 ・
                 ・
                 ・
# -*- coding: utf-8 -*-

import argparse
import os
import sys
import xml.etree.ElementTree as ET

Doxygen = None

def SetupDoxygen(directory, entry):
  global Doxygen
  Doxygen = DoxygenXml(directory, entry)


class Member(object):
  """DoxygenのXML出力のmember要素に相当するクラス
  """

  __members = {}

  @classmethod
  def get(klass, id, c_ref=None):
    if not klass.__members.has_key(id):
      klass.__members[id] = None #循環参照を回避するため、仮エントリ登録
      aMember = Member(c_ref, id)
      klass.__members[aMember.id] = aMember
    return klass.__members[id]

  def __init__(self, c_ref, id):
    self.c_ref = c_ref
    self.id = id
    self.filename = Doxygen.getCompound(c_ref).find('name').text
    element = self.getMember()
    #-----
    self.kind = element.attrib['kind']
    self.name = element.find('name').text
    self.para = Doxygen.text(element.find('./detaileddescription/para'))

    if self.kind == 'function':
      self.funcs = {}
      self.vars = {}
      for ref in element.findall("./references"):
        c_ref = ref.attrib['compoundref']
        m_ref = ref.attrib['refid']
        ref = Member.get(m_ref, c_ref)
        if ref.kind == 'variable':
          self.vars[ref.id] = ref
        if ref.kind == 'function':
          self.funcs[ref.id] = ref

  def getMember(self):
    return Doxygen.getMember(self.c_ref, self.id)


class DoxygenXml(object):
  """DoxygenのXML出力からデータ取得を行うクラス
  """
  def __init__(self, directory, entry):
    self.directory = directory
    self.entry = entry
    self.index_xml = os.path.join(self.directory, 'index.xml')
    self.doxygenindex = ET.parse(self.index_xml).getroot()

  def getEntry(self):
    for c in self.doxygenindex.findall("./compound[@kind='file']"):
      for f in c.findall("./member[@kind='function']"):
        name = f.find('name')
        if name.text == self.entry:
          return Member.get(f.attrib['refid'], c.attrib['refid'])
    return None

  def getCompound(self, c_refid):
    return self.doxygenindex.find("./compound[@refid='%s']" % c_refid)

  def getMember(self, c_refid, f_refid):
    #print os.path.join(self.directory, c_refid+os.extsep+'xml')
    tree = ET.parse(os.path.join(self.directory, c_refid+os.extsep+'xml'))
    root = tree.getroot()
    return root.find("./compounddef/sectiondef/memberdef[@id='%s']" % f_refid)

  def getAllFiles(self):
    return self.doxygenindex.findall("./compound[@kind='file']")

  def getMembers(self, kind=None):
    refs = []
    for compound in self.getAllFiles():
      name = compound.find('name')
      c_refid = compound.attrib['refid']
      if kind is None:
        xpath = "./member"
      else:
        xpath = "./member[@kind='%s']" % kind
      for member in compound.findall(xpath):
        ref = Member.get(member.attrib['refid'], c_refid)
        refs.append(ref)
    return refs

  @staticmethod
  def text(element):
    if element is None:
      return ""
    else:
      return element.text


class Process(object):
  """DocygenのXMLをCSVに変換する処理
  """
  def __init__(self):
    #self.encode = 'sjis'
    #sjisだと、'〜'、'‖'、'−'、'¢'、'£'、'¬'などの一部の記号類が文字化けする
    self.encode = 'cp932'

  def output(self, msg):
    print msg.encode(self.encode)

  def do(self):
    entry = Doxygen.getEntry()
    if entry is None:
      self.processWithoutEntry()
    else:
      self.processWithEntry(entry)

  def processWithEntry(self, entry, level=0):
    max_level = 10
    if level==0:
      self.output(u"ファイル名,L1,L2,L3,L4,L5,L6,L7,L8,L9,L10,参照変数名,説明")
    if entry is None:
      return
    try:
      self.output((u"%s,"+u","*level+u"%s"+u","*(max_level-level)+u",%s")
                 % (entry.filename, entry.name, entry.para))
    except Exception, e:
      self.output((u"%s,"+u","*level+u"%s"+u","*(max_level-level)+u",%s")
                 % (entry.filename, entry.name, u'<変換エラー:おそらくエンコードが違います>'))
      raise e
    #参照変数
    for v in entry.vars:
      m = Member.get(v)
      self.output((u","*(1+max_level)+u"%s,%s")
                  % (m.name, m.para))
    #参照関数
    for f in entry.funcs:
      self.processWithEntry(Member.get(f), level+1)

  def processWithoutEntry(self):
      self.output(u"ファイル名, 関数名, 参照変数名")
      for f in Doxygen.getMembers('function'):
        print "%s, %s, %s" % (f.filename, f.name, '')
        for v in f.vars:
          e = Member.get(v)
          print "%s, %s, %s" % ('', '', e.name)

def main():
  parser = argparse.ArgumentParser(description="""Doxygen-XML出力解析""")
  parser.add_argument('-d', '--directory',default="."+os.sep+'generated'+os.sep+'xml')
  parser.add_argument('-e', '--entry',default="hoge_sch")
  args = parser.parse_args()
  SetupDoxygen(args.directory, args.entry)
  Process().do()


if __name__ == '__main__':
  main()
簡単なスクリプトでこんなことができるのは、Doxygenのおかげ。Doxygenエラい。各関数のソースコードも特定できるので、ちょっと手を加えると、フローチャートの自動生成もできるかもしれない。
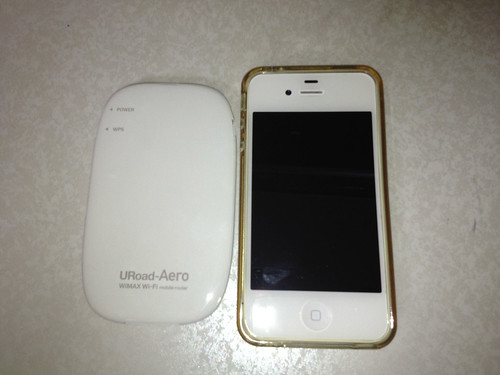
URoad-Aeroが届いた
今まで使っていたモバイルWiFIルータのMobileCubeを、父用に実家に置いてきた。新しいのが早く届かないかと思っていたら、盆前に頼んでいたURoad-Aeroがようやく届いた。大きさは、iPhone4Sと比べると一回り小さいくらい。今まで使っていたMobileCubeに比べて、かなり大きく感じる。MobileCubeは69g、URoad-Aeroは74g。実際に持ってみて、重さの違いは分からない。ただ、かなり薄くなっている。ポケットに入れる時には、かえってこちらの方がいいのかも知れない。デザイン自体は、MobileCubeの方が好みだが、基本的に裏方さんなのでどうでもよい。
バッテリー取付けのためにカバーを外そうとするが、うまくとれない。マニュアルには、上端の隙間からカバーを引き上げる、というくらいしか書いていないが、無理にやるとツメが折れそう。まず、上端の隙間を引き上げた後、隙間の横に爪を滑らせ、上から順に片側のツメをすべて外したら、うまくいった。片側をすべて外してしまえば、反対側は簡単にとれる。
ACアダプターがとてもコンパクトにできていて、好感が持てる。
MobileCubeでは使用時間は10時間、体感もほぼ同じ。通常の使用では十分だったが、会社で充電を忘れてしまい、iPhoneは生きてるのにネットは使えないという状況に時折り陥った。やはり、使用時間は長いにこしたことがない。URoad-Aeroは12時間というから、改善されることを期待している。